Printing
Students need a lot of practise in order to learn correct printing techniques and this is especially true in Grade One. Research shows it can take two years of practise to learn how to print a letter correctly before it becomes automatic. Research also shows that correct and automatic letter printing and handwriting is correlated with improved reading and writing skills. Effortless, correct printing means the skill has become embedded in long term memory. Only after the technical skills of printing have become automatic can the valuable space in short term memory be used for comprehending what is being printed, thinking through what word needs to be written next, how to use capitals and punctuation, etc.
It is very important that your child consistently print their letters and numbers on the line, with the correct size, and with the correct technique. The hardest habit to break at this age is bottom up printing. It is natural for very young children to hold writing utensils close to them and push outward. This is where the bottom up habit comes from. However, correct printing must be top down. Sometimes this language is hard for a child to understand. You might instead say “start far away and come closer”.
Here is a chart showing correct letter formation for numbers and uppercase and lowercase letters:

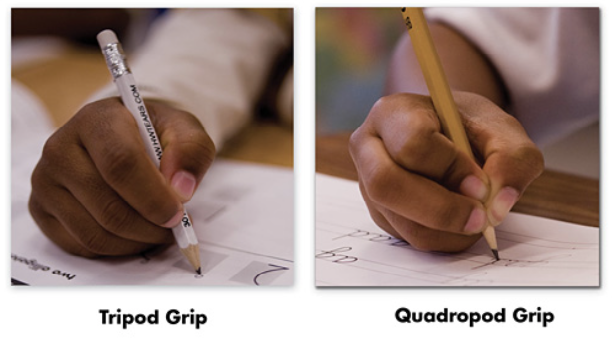
Correct Pencil Grip or “Pinch and Flip”
- have your child hold a small object such as an eraser or a marble in the palm of their hand using only their pinky and ring finger
- place the pencil on the table pointy end towards their belly button
- pinch the pencil with thumb and forefinger (pointer finger)
- pick up the pencil and flip it into the cradle between thumb and forefinger
- place the third or middle finger under the pencil for support (like a bed to rest on)
- the small object in the palm can be removed. Its purpose is to show that the last two fingers are not supposed to touch the pencil. Some students like to continue holding the object, but this is not necessary.
The paragraph below is taken from Handwriting Without Tears excerpt Fall 2011:
“Good habits that begin in early years will last a lifetime—and holding a crayon or pencil correctly is a very important habit. Awkward grips can cause fatigue, cramping, and even pain—making writing difficult. This problem can be prevented. The foundation starts with general upper body strength and fine motor skill activities. Children need to learn proper grip at an early age before it becomes difficult to break poor habits.”
TCCC Printing: Trace, Copy, Cover, Close your eyes
(Learning Printing by Diana Hanbury King and Karen K. Leopold)
Grade One students are first taught letter formation by focusing on proper pencil grip and by using the TCCC routine. Each letter of the alphabet is taught with a four part worksheet:
Line 1: trace the first line of letters
Line 2: copy the letters while looking at the letters on Line 1
Line 3: cover Line 1 and 2 and print the letters from memory (this is called retrieval practise)
White space on the bottom of the page: place the pencil on an empty spot on the page, close your eyes and print the letter, open your eyes and see how you did! Repeat 5 times. Circle your best letter.
This last step turns the printing practise from a visual experience into a kinesthetic experience. The children really like this part!

Printing instruction in Term One follows the letter sequence being used in our phonics program called Reading Horizons.
Handwriting Without Tears
We continue our printing instruction using the Handwriting Without Tears program. This second time through the alphabet helps the children see similarities and differences between letter groups in letter formation, size, and placement on the page.
The printing books provide double straight lines for the children to print on. “Double lines quickly teach children how to place letters: small letters fit in the middle space, tall letters go in the top space, descending letters go in the bottom space…double lines help children place letters correctly, eliminating line confusion. The base line guide placement, and the mid line controls the size of letters.” (Handwriting Without Tears Grade One teacher manual pg. 55).
Unit 1 Capitals and Numbers 1 – 10
This unit is completed in Term 1 as a review of numbers and uppercase letters. It is done at the same time as the TCCC routine.
Teaching capitals first is a research proven best practise. Please note that all capital letters are made from simple lines and curves. HWT uses child friendly language to group capital letters. There are Frog Jump capitals, Corner Start capitals and Center Start capitals.
Children learn capitals first to gain the skills of using lines and curves to make letters. Capital letters help build motor memory to start at the top because all capitals start tall and go down to touch the writing line.
Next we teach numbers. Numbers are tall and all made from simple lines and curves. Numbers also reinforce the motor memory of starting from the top.
Unit Two Lowercase c o s v w t and a d g
Lowercase letters c o s v w t are formed exactly the same way as capitals (lowercase t is just crossed lower). By introducing two vowels early in the teaching sequence the children can begin printing words. Lowercase a d g o letters begin with a “c” shape. HWT refers to the letter c as Magic C.
Unit Three Lowercase u i e and l k y j
Introducing more vowels allows more words to be used in the program. Lowercase l k y j are familiar from capitals however attention must be paid to their placement on the line and their size.
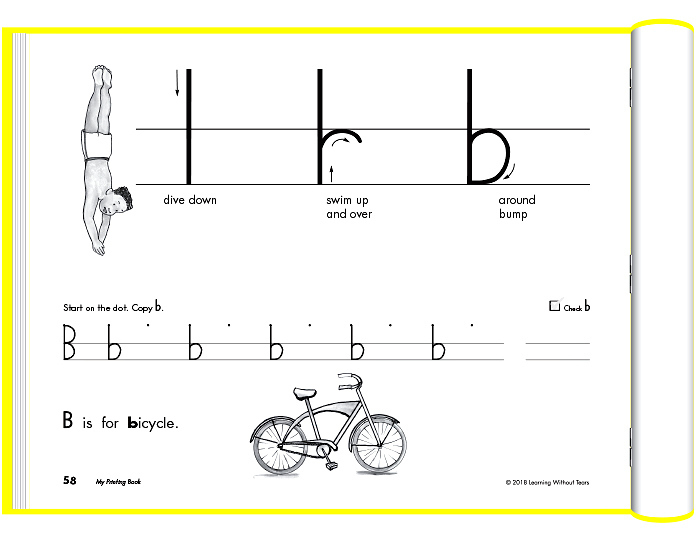
Unit Four Lowercase p r n m h b and f q x z
Lowercase p r n m h b all start with the same pattern: they dive down, swim up, and swim over. The letters d and b are taught far apart in the program to help avoid d/b confusion. Lowercase f has a tricky start. Lowercase q is taught here to help avoid g/q confusion. Lower case x and z are familiar from capitals but are infrequently used.
Printing With Sentences
The third time through the alphabet we reteach letter formation with a review worksheet for each letter. Early in the instructional process we are careful to teach uppercase and lowercase letters separately. In this review both types of letters are on the same page. To this we add a second worksheet with sentences for the students to copy. Many of the words in the sentences are spelled with the focus letter.

Printing Research
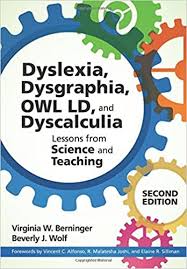
Dyslexia, Dysgraphia, OWL LD, and Dyscalculia by Virginia Berninger and Beverly Wolf is an excellent book that summarizes research on, among other topics, printing. The points that follow are from Chapter 3 entitled “Assessment-Instruction Links for Handwriting.”
The act of printing letters, words, and sentences uses many different brain systems. Thoughtful printing instruction understands all the brain systems at work and includes activities that stimulate and reinforce these systems. They systems are: (pgs. 29 – 33)
- motor systems through fine motor skills and muscle strength in the hands and fingers
- sensory systems through hearing (listening for letter names), visual (viewing letters and analyzing letter formation), and somatosensory (learning the right pressure to apply to a pencil and other hand movements and skin sensations)
- language systems through hand (letter production), ear (listening for dictated letters), mouth (saying letter names), and eye (viewing and analyzing letter formation)
- cognitive processes through the need for developing writers to connect together skills learned from printing, spelling, and composition instruction
- attention and executive systems through sustaining attention and transitioning between the different skills needed while printing
- social emotional systems through possible negative emotional states for students who find printing, spelling, and composition difficult
Printing instruction aims for legibility first. After students are able to print their letters correctly, then printing instruction continues with practise for automaticity. (pg. 33)
“Automatic recall requires many, many exposures – sometimes as many as 200….” (pg. 15)
“Writing in manuscript [printing] transfers to word reading (James & Atwood, 2009), writing in cursive transfers to spelling and composition (Alstad et al., 2015), and keyboarding helps with producing multiple drafts and revisions, especially after students progress beyond hunting and pecking to touch typing, MacArthur (2008, 2009).” (pg. 45)
A Very Short Summary
First – TCCC routine for lowercase letters while learning letter identification. Simultaneously students review uppercase letters and numbers with the Handwriting Without Tears program Unit 1.
Second – Handwriting Without Tears program Units 2 – 4
Third – letter formation review of uppercase and lowercase letters as well as practising sentence printing.
1. Printing practise requires that adults make sure students sweat the small stuff: hold the pencil right, print letters from the top down, print letters the correct size, print on the line.
2. This “small stuff” is actually pretty “big stuff” in the Grade One world. It takes up to two years for correct printing formation to become automatic and effortless.
3. Learning how to print uses multiple systems in the brain.
4. Parents, if you can be persistent about correct printing skills for your child it will pay off later, we promise!
References